I have been reading up on exposures and flash photography of late. A very good knowledge of how my speed light works is important as well. So for this exercise on contrast and shadows, i bought some cardboard, aluminum foil and cellotape to set up the exercise. The flash light had to be about 2 to 3 feet away from the subject. So i used i/128 power of the speedlight which indicated an ISO of 500 with aperture of f/16 to get the required 2 to 3 feet flash to subject distance. Image 1 and 2 below show the set-up.
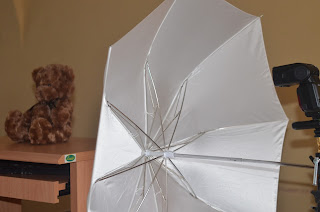 |
| Image 1: Set-up for Contrast and Shadow fill exercise |
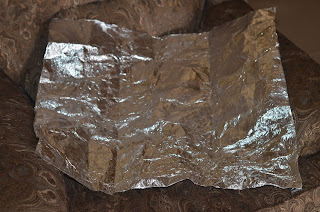 |
| Image 2: Aluminium foil wrapped on white cardboard. |
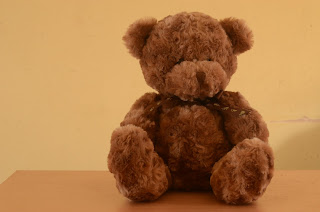
Following the instructions from my manual i took about twelve exposures to illustrae Contrast and shadow fill. The effects of the light with and without the diffusers, with the white card board and aluminium foil as well as with the aluminium foil crumpled together is shown the these next photographs.
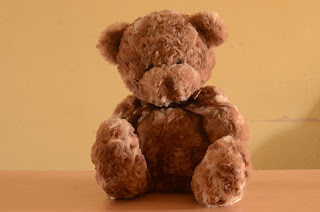 |
Image 3: Object without diffuser, ISO 500,50mm,rev,f/16,8.0s
|
 |
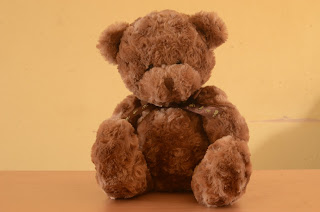
| Image 4:Object with diffuser, ISO 500,50mm,f/16,10s |
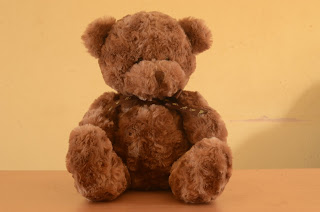
The effect with and without the diffuser can be seen when the two images above are compared. Shadows and highlights are very obvious in image 3, but with the diffuser the light is spread more evenly reducing the contrast. The next five exposures were all taken same with image 4.
 |
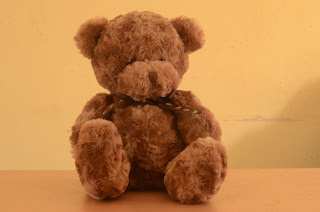
| Image 5:Object with a diffuser,ISO 500,50mm,f/16,10s |
 |
| Image 6:Object with a diffuser,ISO 500,50mm,f/16,10s |
|
 |
| Image 7:Object with a diffuser,ISO 500,50mm,f/16,10s |
 |
| Image 8:Object with a diffuser,ISO 500,50mm,f/16,10s |
 |
| Image 9:Object with a diffuser,ISO 500,50mm,f/16,10s |
After these exposures, I took the white cardboard and placed it three feet from the object on the oppsite side of the light and took the next picture.
|
Image 10:Object with White card three ft from the object on the opposite side,ISO 500,50mm,f/16,10
|
 |
| Image 11: Dull side of aluminium foil facing object:ISO 500,50mm,F/16,13s |
 |
| Image 12: White card board 1.5 ft away from object:ISO 500,50mm,F/16,13s |
 |
| Image 13: Shiny side of foil paper facing object:ISO 500,50mm,,F/16,13s |
I
 |
| Image 14: Crumbled shiny side of foil paper facing object |
This exercise has indeed shown to me how we can use reflectors and diffusers to control contrast and shadows. I have to admit prior to now I did not really have an idea of their functions anytime i visit a studio and see all the works. With a little more practice, I will be able to modify the light system in a studio. I know that that what i had to use was a bit limiting in some ways but nevertheless it opened me up to the diverse ways we can manipulate light to produce a visually appealing image.
CONCLUSIONS
1.The diffuser produces a softer light which reduces areas of high contrast on the image.
2.The shiny surface of reflectors make a difference when it is put on the opposite side of the subject/object from the light.
2.High Contrast tends to produce more evocative and atmospheric images.
3.


No comments:
Post a Comment